Introduction
The People / Employees module of AGIR allows you to centralize all user information in a single place, integrating personal data, documents, permissions and history in a simple and organized interface.
This module facilitates Human Resources management, ensuring greater control, traceability and organization of information.
See this article to learn how to enable the new user page.
1. Access the employee profile
When accessing a user, their profile is displayed, with a summary of their information.
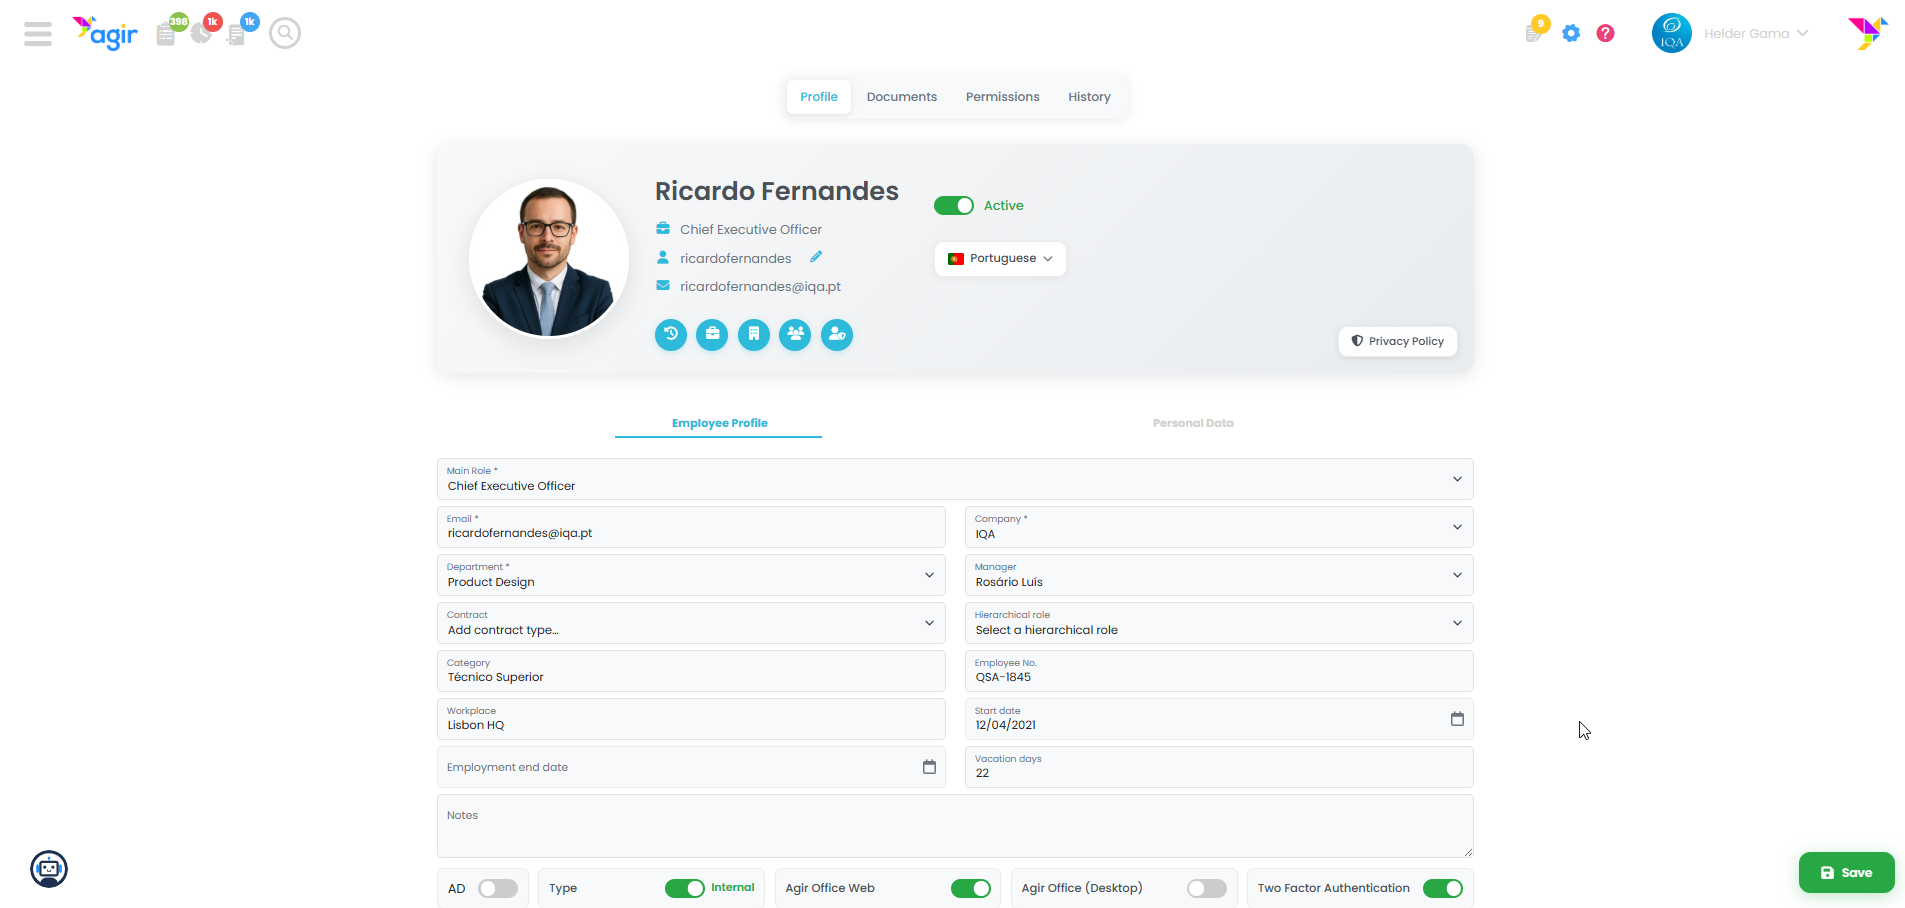
In this area you can quickly consult:
- Name
- Position
- Username
- Status (active/inactive)
- Language
2. Profile tab
In the Profile tab you will find the employee's full record.
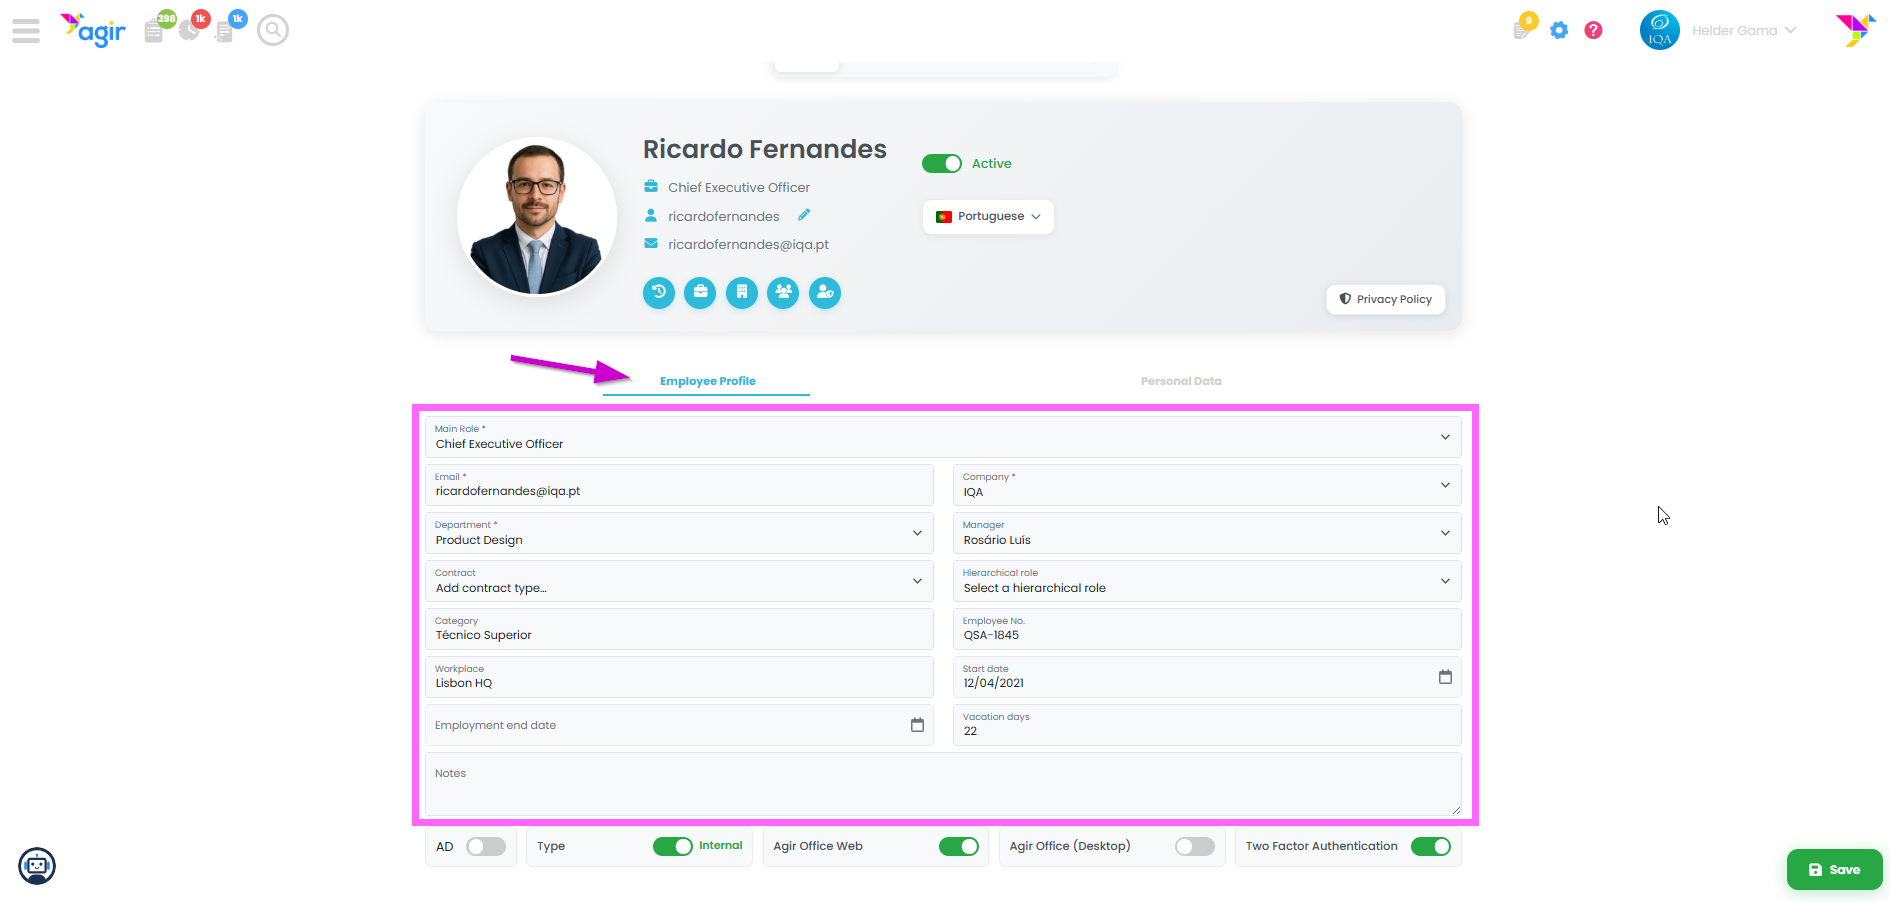
Available information:
- Main position
- Department
- Company
- Hierarchical manager
- Contract type
- Work location
- Employee number
- Admission date
- Vacation days
- Notes
Available settings:
- User type (internal/external)
- AGIR Office Web Activation
- Activation of two-factor authentication (2FA)
This section ensures centralized management of the employee's data.
3. Personal Data Section
Within the Profile tab, the Personal Data subsection is available, with detailed information about the employee.
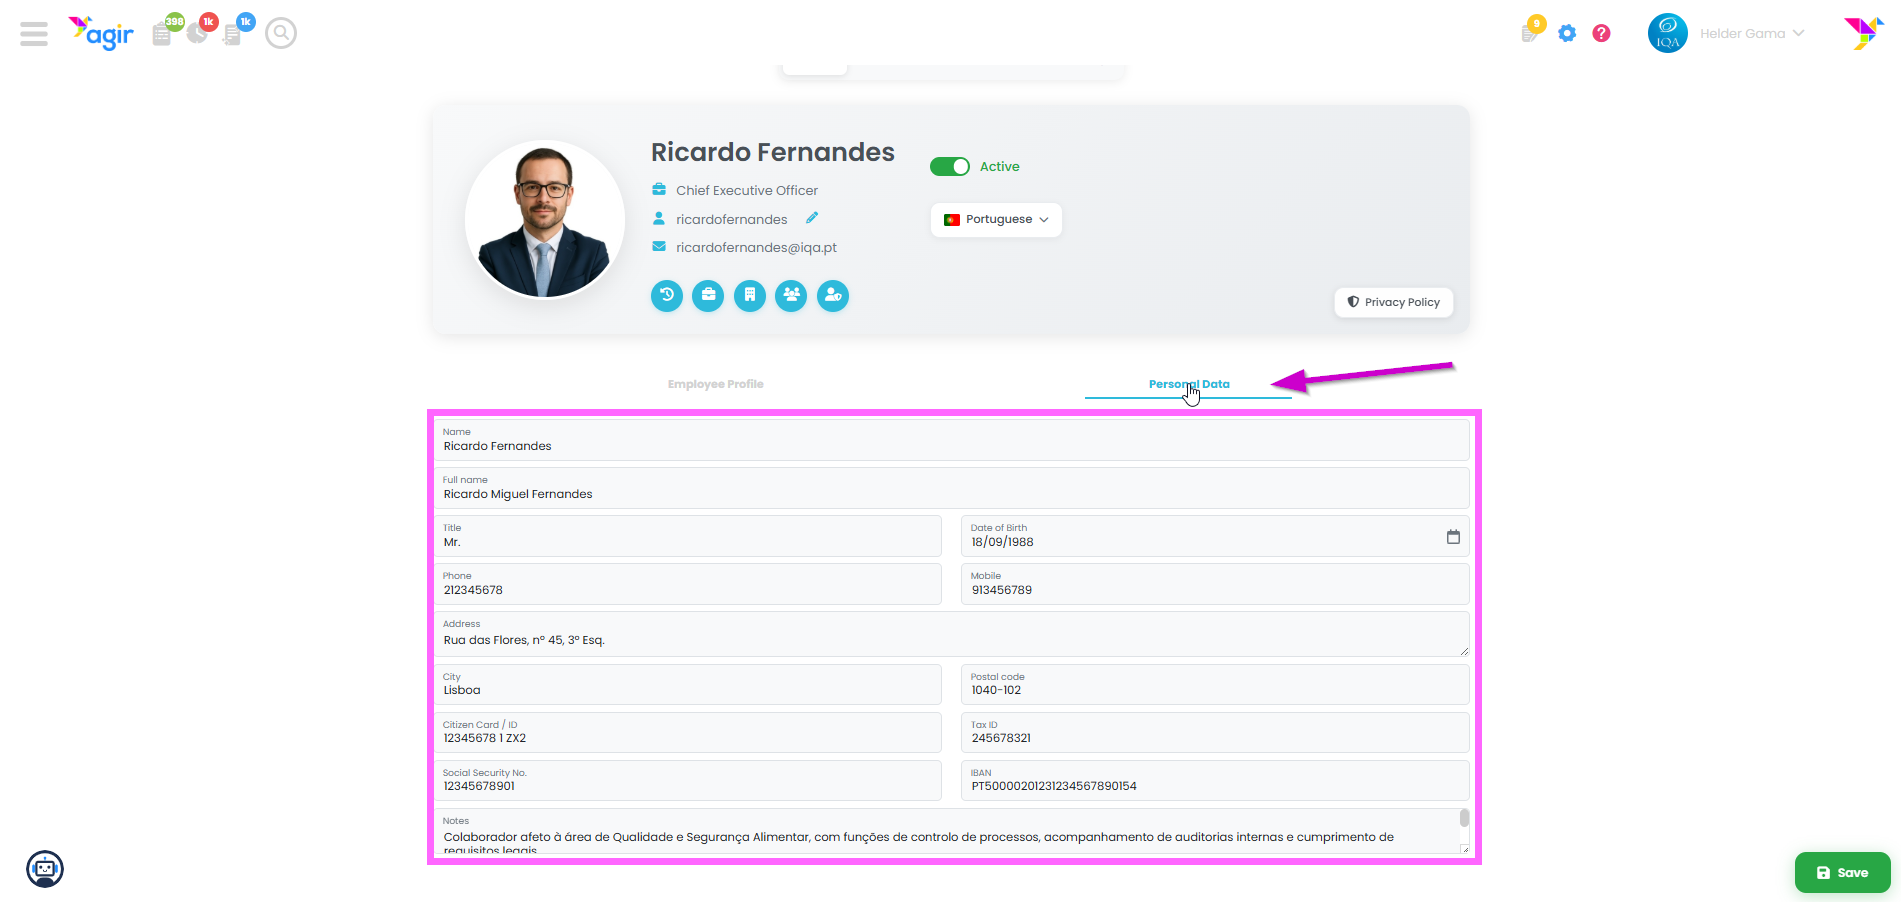
Available information:
- Name and full name
- Title
- Date of birth
- Phone and mobile
- Address
- City and postal code
- Identification document (Citizen Card / ID)
- Tax identification number
- Social security number
- IBAN
- Notes
This section allows you to consolidate all relevant personal information for administrative and documentary management.
ATTENTION : AGIR does not require personal data. The only field required in this menu will be the Employee Name.
4. Documents tab
In the Documents tab, you can manage all documentation associated with the employee.
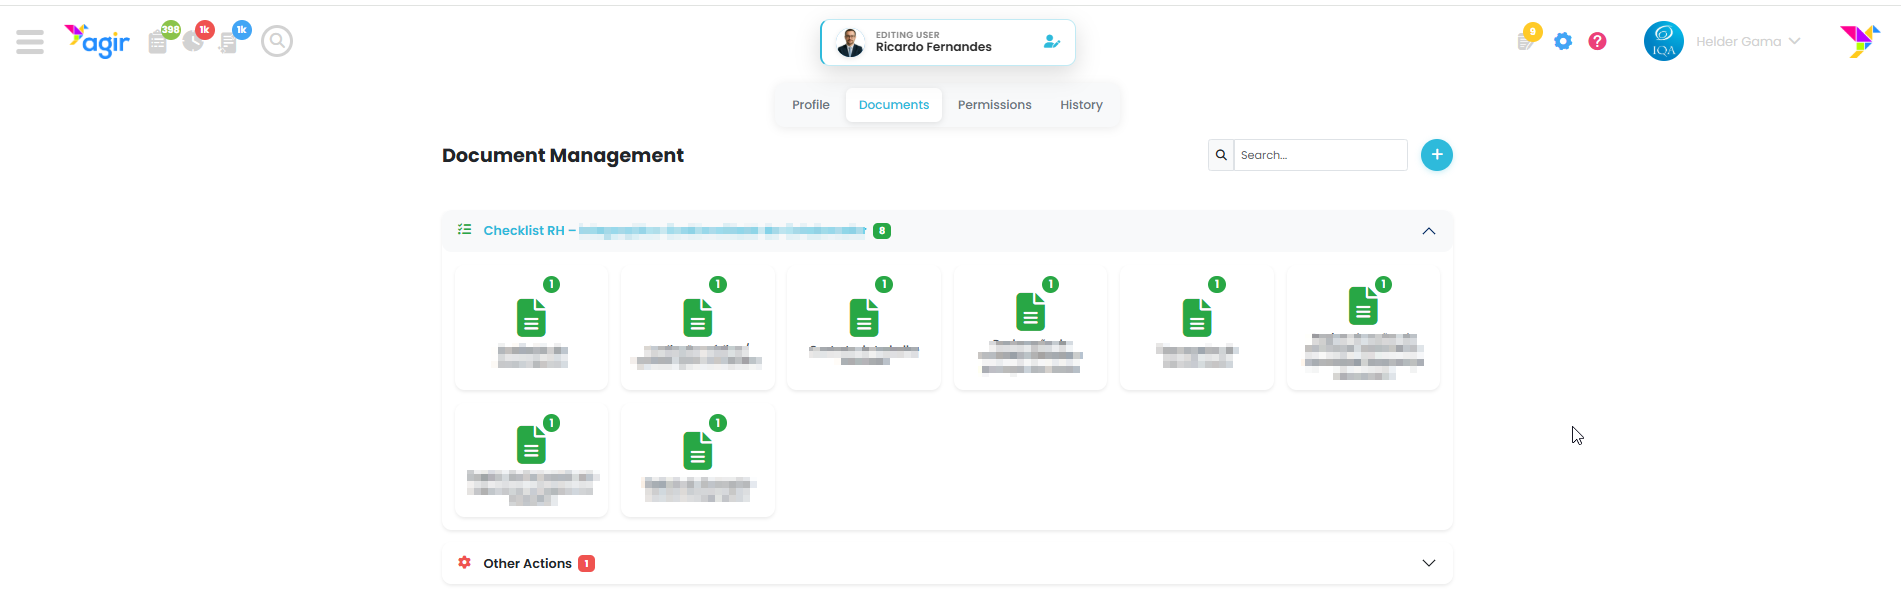
Main features:
- View the user's documents
- Create new documents and actions
Add new items
In the upper right corner you will find the button , which allows you to add new items to the employee's document management.
Addition menu accessible via the button, allowing you to create new documents, actions or checklists directly on the employee's record.
Through this menu you can add:
Document Checklist
To structure sets of mandatory documents associated with the employee (e.g.: onboarding, certifications, compliance).Actions Checklist
To define tasks or processes to be completed associated with the employee.Document
To upload new documents directly.Action
To record individual actions related to the employee.
Structure by HR Checklist
Documents can be organized into checklists, such as an Employee Onboarding and Compliance checklist.
See this article to learn how to create a Human Resources Document Checklist.
5. Permissions tab
In the Permissions tab you define the employee's access to AGIR Document and Process Workflows.
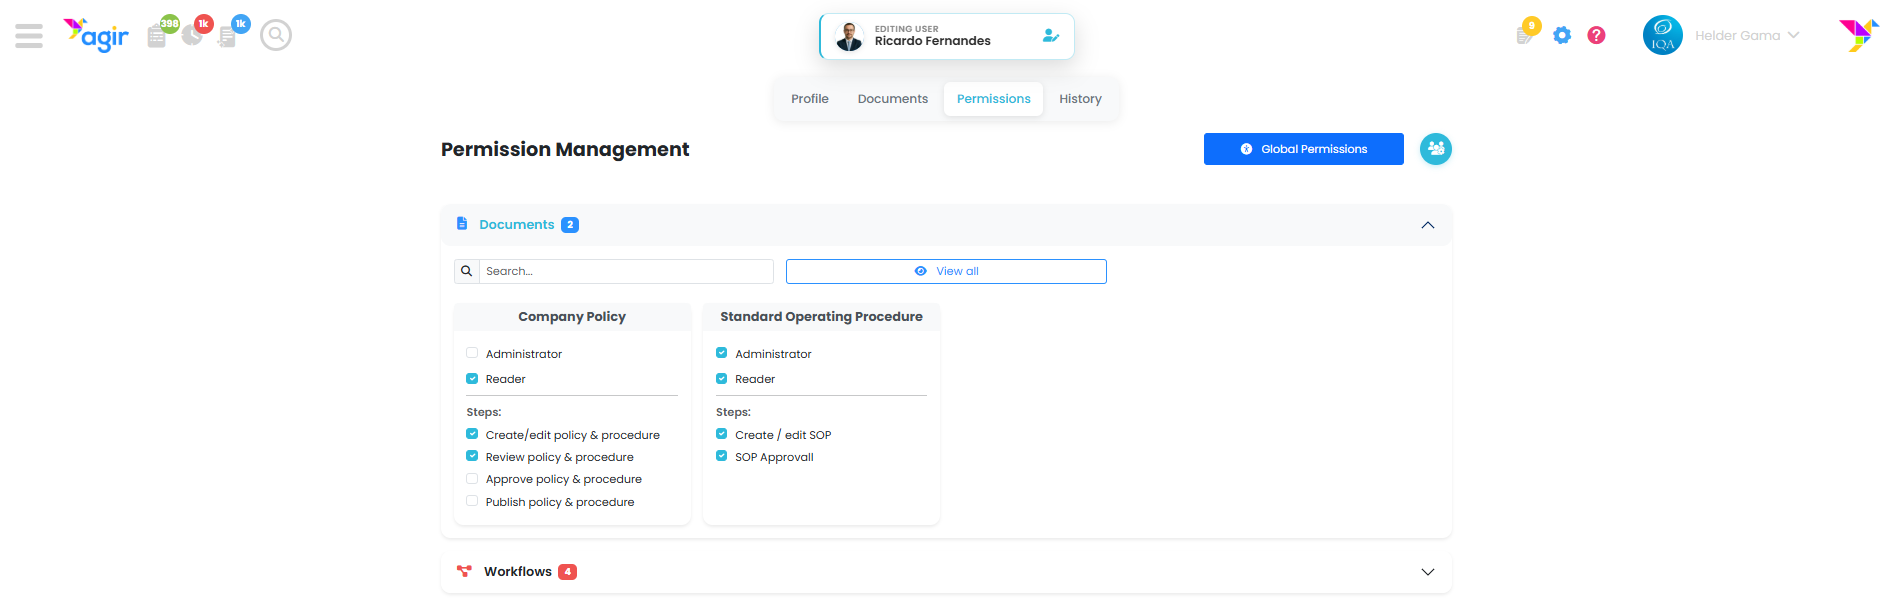
You can configure:
- Global permissions in the Workflow (Administrator and Consultant). See article.
- Permissions by step. See article.
- Global application permissions (AGIR Administrator, Equipment Manager and People Manager). See article.
This feature ensures that each user has appropriate access for their role.
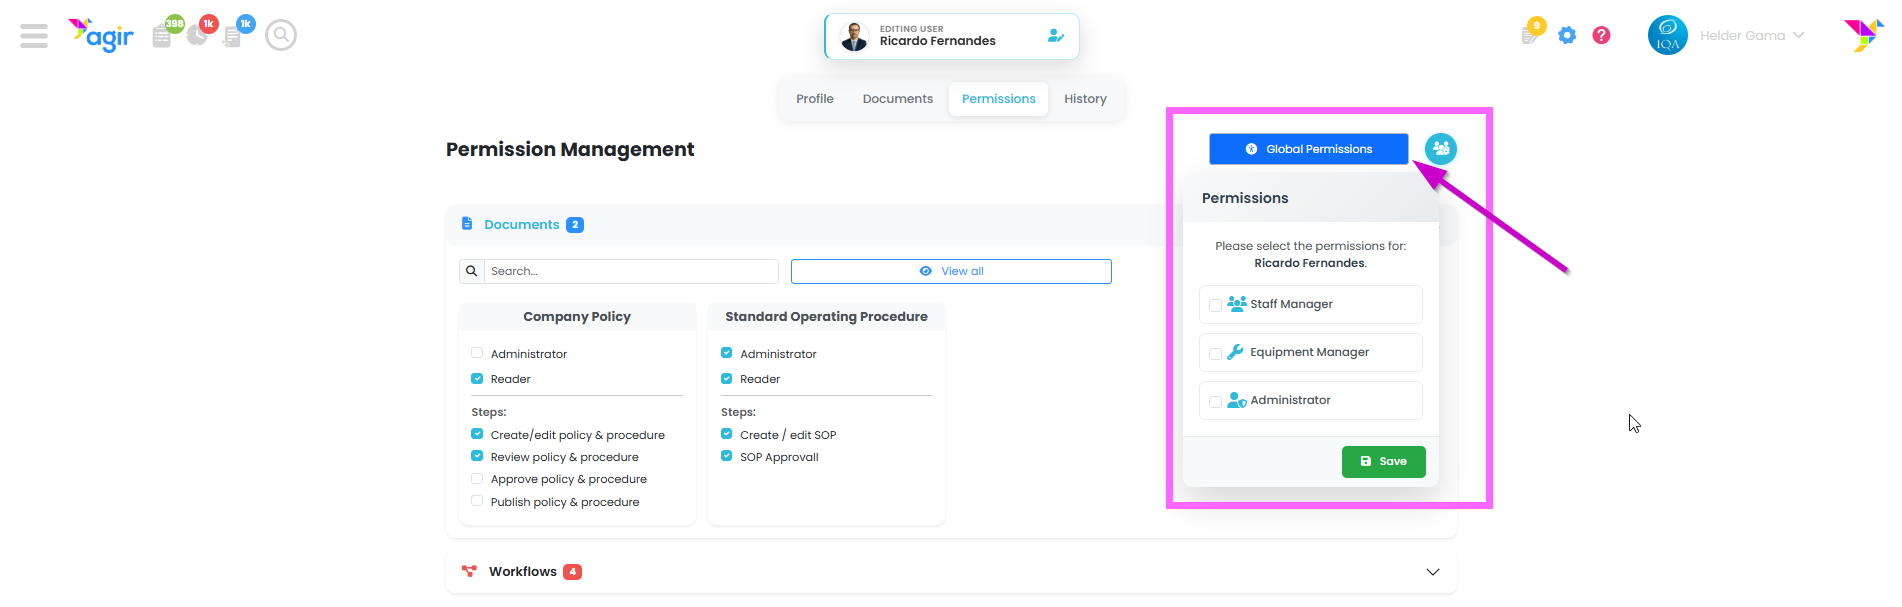
5.1 Cloning permissions
In the Permissions tab, a button is available that allows you to clone permissions from another user.
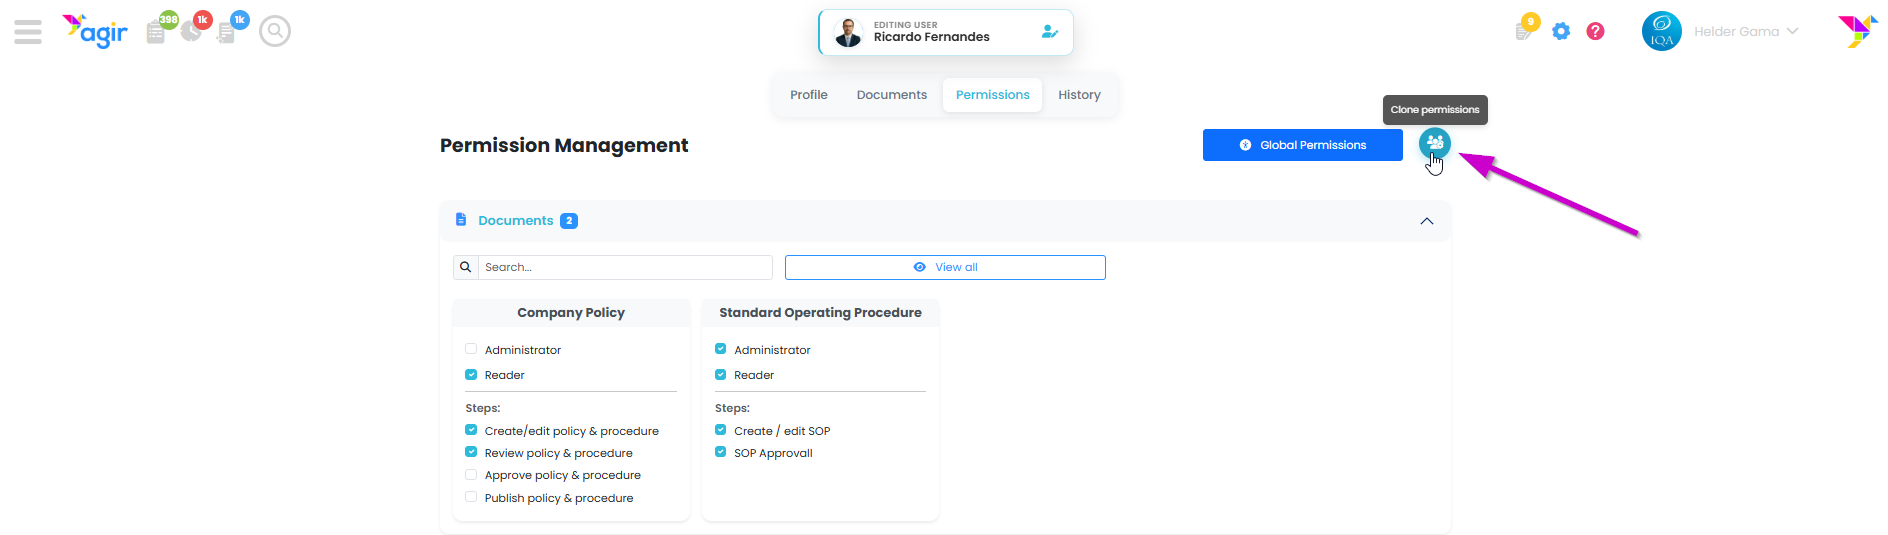
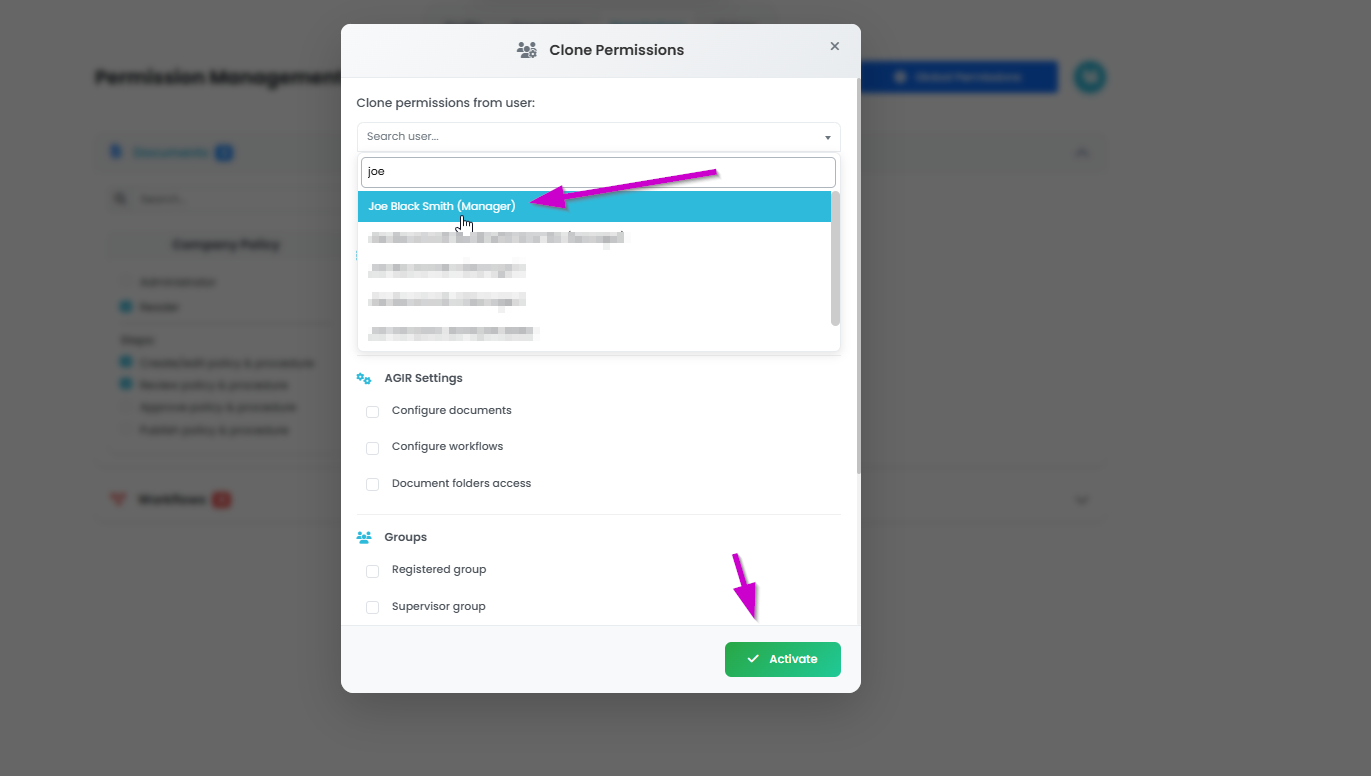
By clicking this button, you can select a base user and replicate their permissions, making it easier to configure new users with similar roles.
6. History tab
The History tab allows you to view all changes associated with the employee.
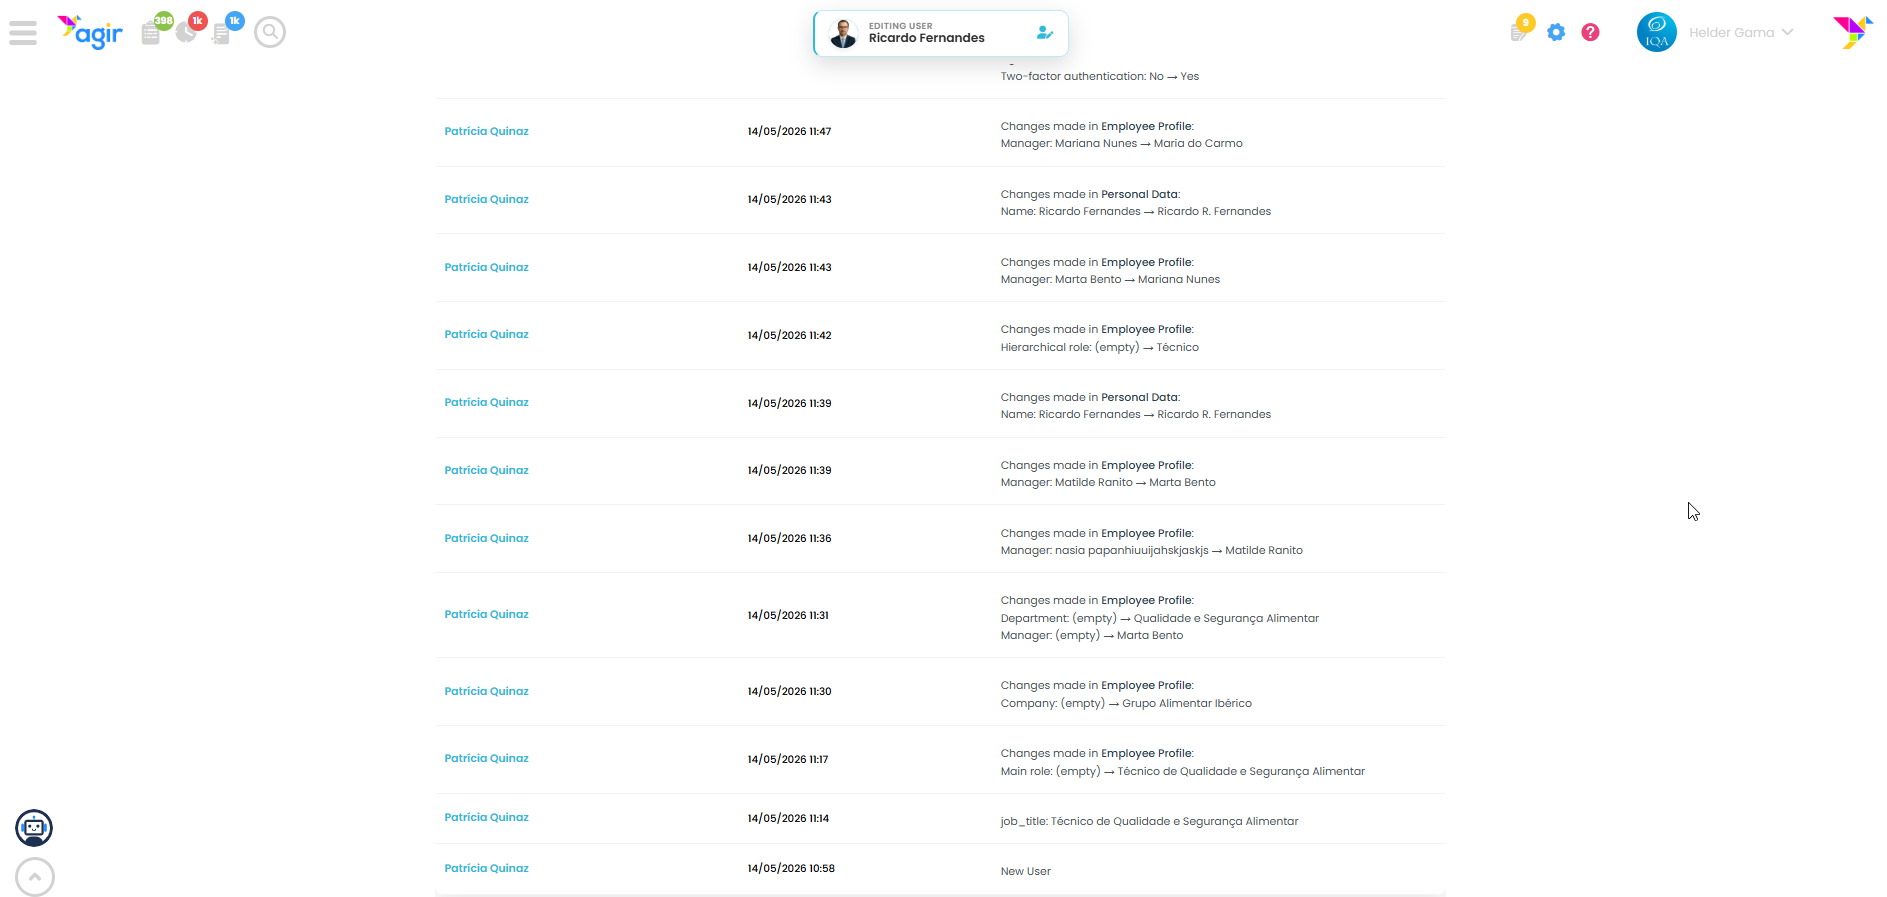
Available information:
- Name of the person who performed the action
- Date and time
- Description of the change
Examples of records:
- Data changes
- Language change
- Permissions setting
- Password change
- Automatic system actions
This section ensures full traceability and is essential for audits.
7. Save changes
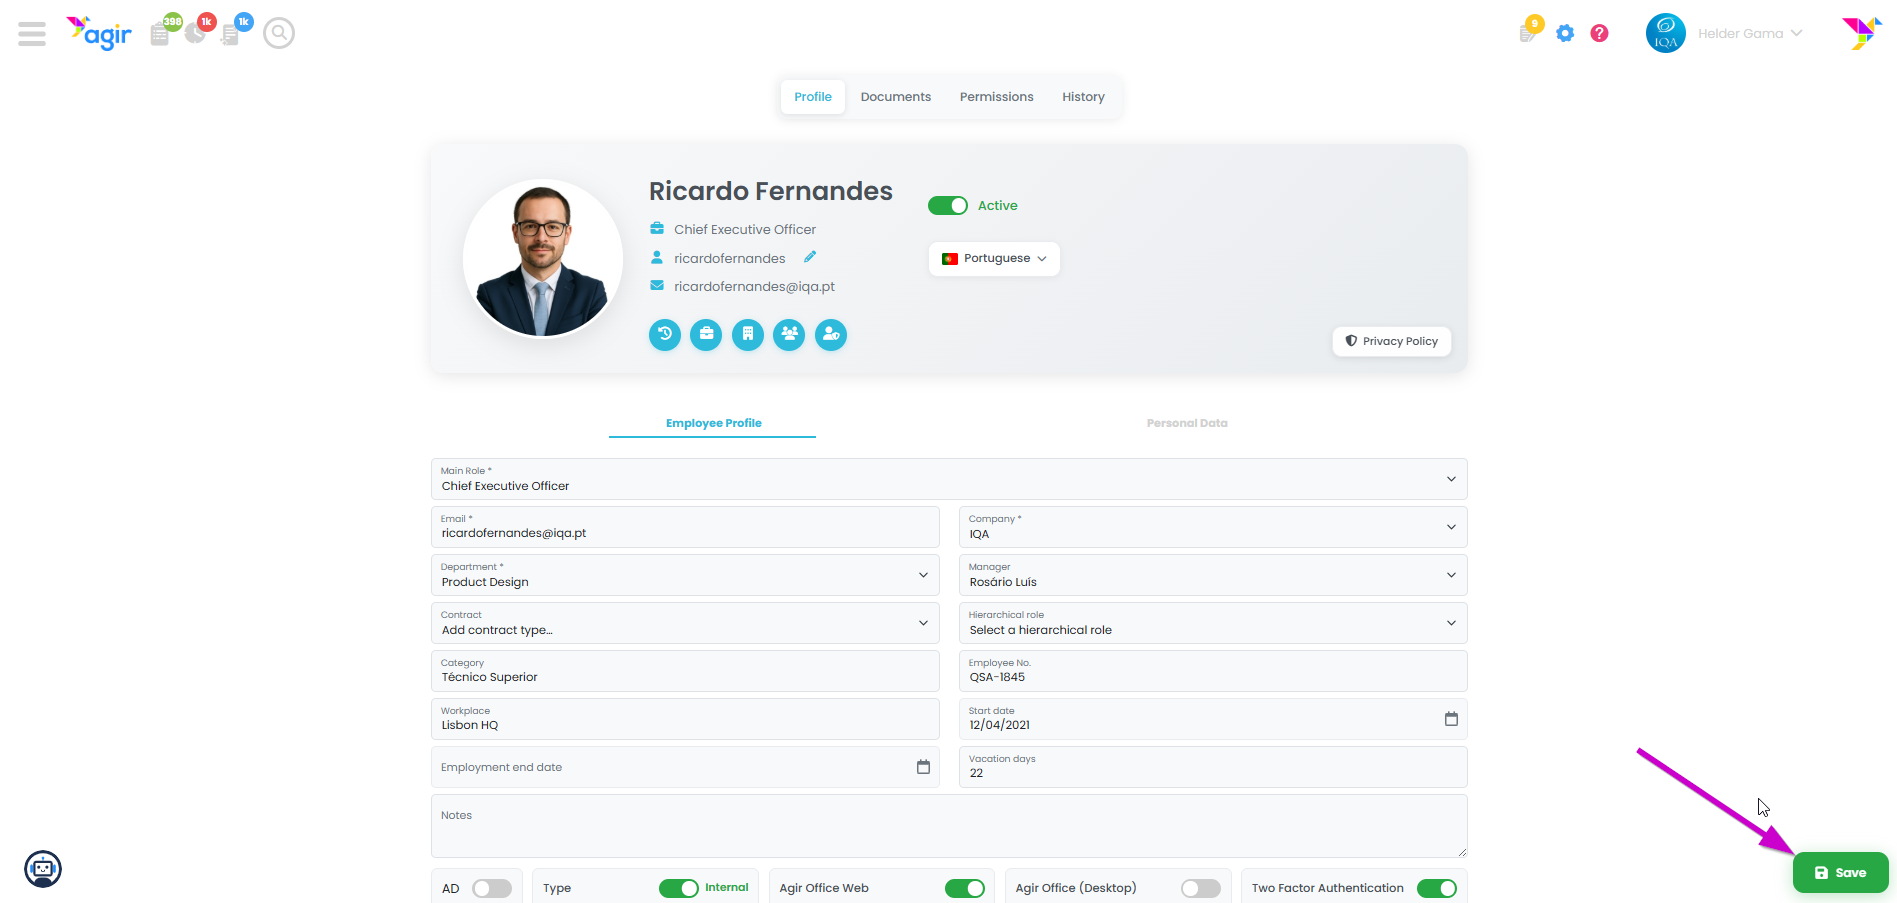
After editing the employee's information, you must save the changes.
Best practices
- Keep the employee's data up to date
- Ensure documents are organized
- Set permissions according to the role
- Use the history for monitoring
- Enable 2FA whenever possible
Was this article helpful?
That’s Great!
Thank you for your feedback
Sorry! We couldn't be helpful
Thank you for your feedback
Feedback sent
We appreciate your effort and will try to fix the article